
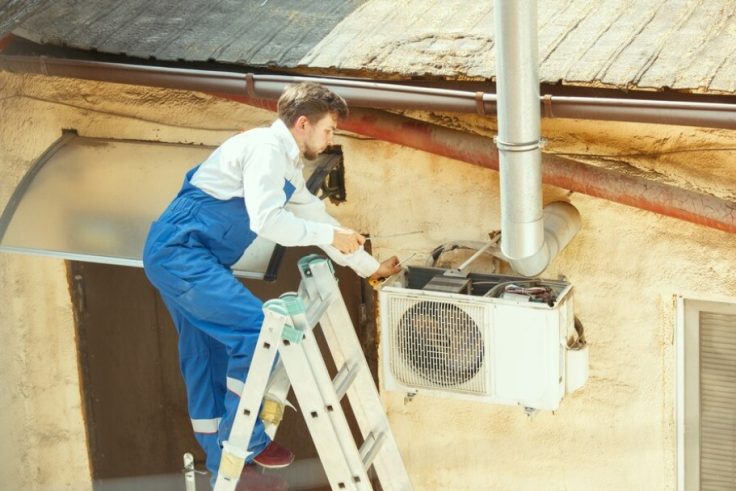
Your kitchen exhaust fan filter works behind the scenes to capture grease, smoke, and lingering odours. But like any other appliance, it needs a little TLC to stay in top shape. A greasy filter can reduce your fan’s efficiency, leading to increased energy consumption and even potential fire hazards.
If you are considering restoring your exhaust fan filter to its former function, continue reading. This blog will walk you through a step-by-step process for cleaning your fan filter thoroughly, ensuring your kitchen’s air quality remains fresh and your home stays safe.
Cleaning a kitchen exhaust fan filter is essential for maintaining a healthy and efficient kitchen and offers several benefits. Here are some of the benefits:
The primary role of an exhaust fan filter is to trap grease, smoke, and odours produced during cooking. Over time, these byproducts can accumulate on the filter, reducing its ability to clean the air. This can lead to a less-than-pleasant kitchen experience, with lingering odours and potentially harmful particles circulating. To keep your kitchen environment fresh and healthy, it’s essential to give your filter a regular deep clean through reliable exhaust fan repairs.
A clean filter enables your exhaust fan to operate at its optimal efficiency. When the filter becomes clogged with grease and grime, the fan must exert more effort to pull air through the obstruction, potentially reducing its overall performance. This increased strain can lead to higher energy consumption and may shorten the lifespan of the appliance. By maintaining a clean filter, you can ensure that your exhaust fan runs smoothly and efficiently, conserving energy and minimising wear and tear.
Grease buildup in an exhaust fan filter is a serious fire hazard. Grease is highly flammable, and if it accumulates in your filter, it can ignite when exposed to high cooking temperatures or a spark. Regular cleaning of the filter removes this grease, significantly reducing the risk of a kitchen fire and ensuring your cooking space remains safe.
Regular maintenance, such as cleaning the filter, can significantly extend the lifespan of your exhaust fan. When the fan isn’t burdened by a clogged filter, it operates more efficiently, reducing strain on the motor and other components. This can lead to fewer breakdowns and repairs, ultimately saving you money by preventing costly replacements on the kitchen exhaust systems.
Installing an exhaust fan in the kitchen can significantly improve ventilation, reduce odours and enhance the overall air quality of your home. Here’s a step-by-step guide to help you through the installation process:
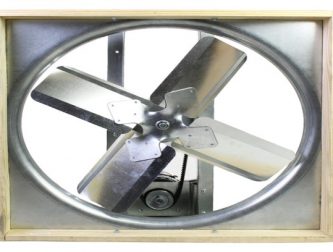
Select an exhaust fan that matches the size of your kitchen. The capacity of the fan is measured in cubic feet per minute (CFM), which indicates how much air it can move. A larger kitchen requires a higher CFM rating to ensure effective ventilation. Also, decide whether you want a wall-mounted, ceiling-mounted, or under-cabinet exhaust fan. Knowing this is important, as each type has its installation method and considerations.
The exhaust fan should be installed above the cooking area to capture smoke, grease, and odours effectively. Ensure that the fan is positioned where it can vent air outside the house, either through a wall or the roof. Plan the ducting route from the fan to the exterior of your home. Remember that shorter, straight ducting is ideal for efficient airflow, while long or convoluted paths can reduce the fan’s effectiveness.
Safety first! Ensure the power to the area where you’ll be working is turned off at the circuit breaker. Use the template provided with the exhaust fan to mark the area where you will cut the hole for the fan. If installing in a ceiling, ensure you can access the attic for ductwork. Carefully cut the hole using a jigsaw, and ensure it’s the right size for your fan. However, it is highly recommended to opt for professional help when carrying out such a task.
Depending on the type of fan, mount it according to the manufacturer’s instructions. Secure the fan to the wall or ceiling using screws and brackets. If it’s an under-cabinet model, ensure it’s firmly attached to the underside of the cabinet. Attach the ducting to the exhaust fan’s outlet. Seal the connections with aluminium tape to prevent air leaks. Run the ducting to the exterior vent, ensuring it is as straight and short as possible to maximise efficiency.
If an exterior vent doesn’t already exist, you’ll need to cut a hole in the wall or roof for the vent cover. Ensure the hole is the correct size and properly aligned with the ducting. Secure the vent cover over the hole, connecting it to the ducting. Make sure it is sealed properly to prevent air leaks and moisture infiltration.
Follow the manufacturer’s instructions to connect the fan to your home’s electrical system. This may involve connecting wires to an existing circuit or installing a new one if the fan requires its own power source. If your exhaust fan doesn’t have a built-in switch, you’ll need to install one. Mount the switch on the wall and connect it to the fan according to the wiring diagram.
Once all connections are made properly, turn the power back on at the circuit breaker. Turn on the exhaust fan to ensure it’s running smoothly and efficiently. Listen for unusual noises, and check that the air is properly vented outside.
If necessary, seal any gaps around the fan or ducting with caulk. In cold climates, insulate the ducting to prevent condensation buildup. Further, ensure all debris is cleared away, and the area around the fan is clean.
While regular cleaning can be done DIY, it is highly recommended to opt for professional help to ensure that the job is done thoroughly and safely. A professional can also inspect the entire kitchen exhaust system, addressing any issues that might go unnoticed during a routine clean.
Don’t compromise on the cleanliness and safety of your kitchen; reach out to us today at 0429 612 624 for expert assistance.

If you have hired or are hiring electricians before, whether for a sma
Improving the air circulation in your house can ensure that every envi
 Optimized by Seraphinite Accelerator
